Competitive 40k tactics and Battle Reports with the Tyranid Codex

Saturday, June 11, 2016

Tyranid Tactics: Winning the Maelstrom

Hello everyone! Jifel here to talk about one of the most maligned armies currently in the game, my beloved Tyranids. Tyranids are often seen as one of the worst codexes in the game, and competitively are often built around their best unit, the Flying Hive Tyrant. Now any competitive Nid list these days is going to include several Flyrants, and for this article I'll assume you're running several, but as good as they are, they're not without weaknesses. While Tyranid flying circus used to be considered a top tier build, it often suffers in Maelstrom missions. Flyrants draw much of their durability from being in the sky, and therefore can't claim objectives. in the mid-game turns. While it's a common tactic to land turn 5+ for an eternal war victory, this isn't a viable tactic in ITC missions, thanks to the Maelstrom component. What is a Tyranid player to do when up to 1200 points of their army is useless in half of each ITC mission?


In order for Tyranids to be competitive at a GT level, they need to have Flyrants. Honestly there's no way around that in the current codex. The "standard" build at 1850 involves 5 of them, with Rippers and Mucolids as troops. It's crucial that the remaining points are spent on units that can help a Tyranid player win Maelstrom missions. We all remember the "LictorShame" list that won several GTs a year or two back, that relied on using Lictors to claim and contest objectives through MSU (Multiple Small Unit) tactics just by overloading their opponent with too many targets to shoot while Flyrants ruled the skies overhead. While Lictors are amazing, they're not the only units that can be used to win you Maelstrom Missions. Today I'm going to break down some tactics that I have found to be very effective in Maelstrom missions.

Step 1: Pick your battles

Most of the ITC Maelstrom missions include both objective control and killing units in the table. With the mobility and firepower of Flyrants, its not very hard to achieve the "kill a unit" when you need to. But, Tyranid Flyrant lists often struggle to control objectives. At the beginning of the game, I recommend looking at both of the missions and seeing if you can realistically win the Eternal War mission. For example, if I'm playing Purge the Alien against Battle Company, or Big Guns against Necrons, I am fairly confident I can take the Eternal War component of the mission. Only then do I decide how aggressive I am going to be in Maelstrom missions. If I'm not confident, I may concede Maelstrom and instead go all out for Eternal War while protecting my warlord, aiming for first blood, and trying to win on the tertiary points. Don't waste effort on a Maelstrom objective you can't win or are hopelessly behind in! For example, there's no easy way to beat a White Scars Razorback Battle Company in mission 3 Maelstrom, where every point is about board control and objectives.


Step 2: Take risks

If you think that Maelstrom is a winnable mission, then it's important to take risks to secure it. My strategy for Maelstrom missions is to limit my opponents points early on instead of trying to keep up with them. This means that I use no-scatter Lictors to contest objectives, or focus my Flyrants firepower on controlling units to deny my enemy points. These are called risks for a reason, as your opponent can then roll the "kill a unit" while your lictor is sitting in his backfield. The way I see it though, its a good trade off to guarantee him losing a point at the risk of him getting it back later. Another uncommon tactic that I have found to be extremely effective is to land my FMCs early. Not my Flyrants that is, but Crones! Crones are sometimes overlooked, but are very durable in the air and also mobile enough to reach almost any objective. When I have a Maelstrom objective that I need, I almost always will land one of my two Crones on it, and force my opponent to choose what to shoot at. A landed, non threatening FMC, or a Flyrant in their face? This often pays off in earning me a point, and then the next turn that Crone simply flies off to spread more mayhem. By limiting my opponents points and selectively taking a few objectives a turn, I am able to keep the maelstrom mission close in almost all of my games, and by turns 4-5 my Flyrants have usually done enough damage that I can start landing with all of my Flyers and edge out a close victory in the Maelstrom. I'm also very aggressive in going for the three-point options in the maelstrom, often leaving a few easy kill points exposed so that I can get them when needed. It's an excellent way to turn the tide!


Step 3: Bring the right units

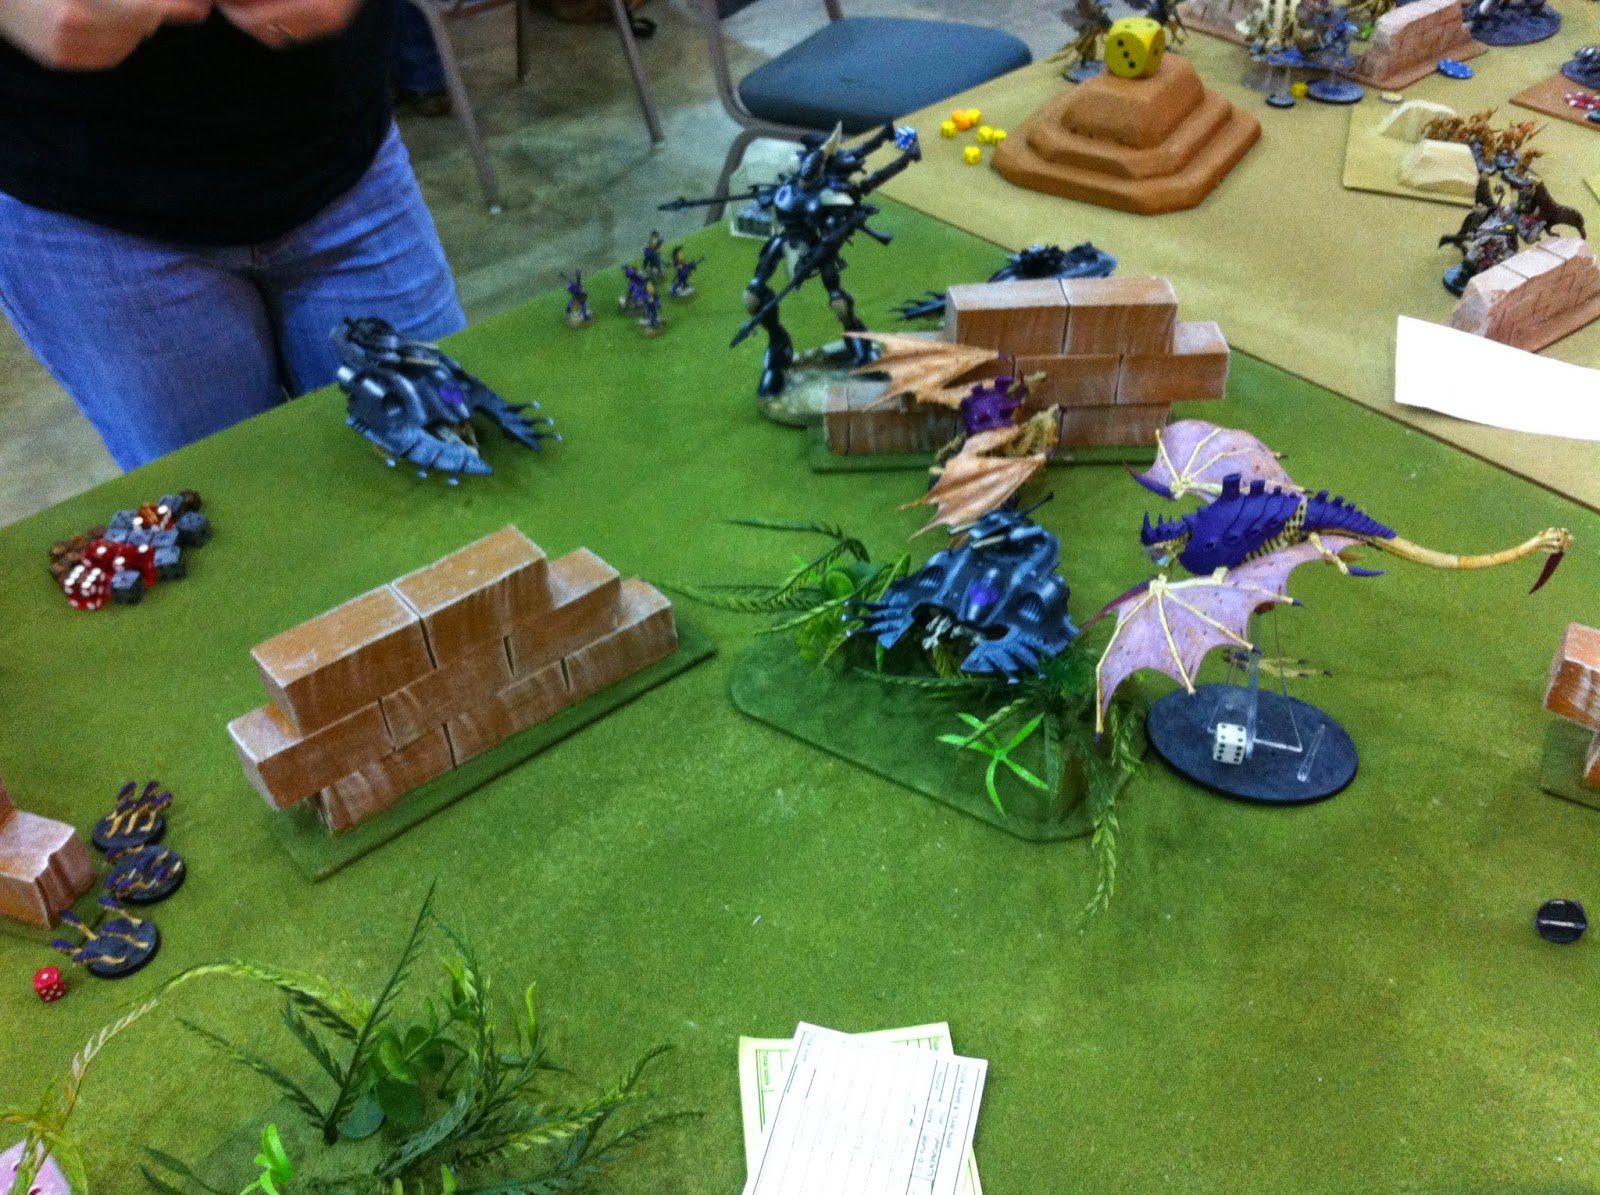
Ok, this really should be step 1 since you (should) write your list before the game starts, but its my third topic. Everyone already knows that Lictors are great units for Maelstrom missions, with their no-scatter deep strike and good cover saves for durability. But there are several other units that I have found to be golden. Rippers, our most common troop, are excellent for grabbing objectives in "no mans land" away from enemy forces. Always put objectives near terrain to protect them! Mucolids are your other common troop, and although they aren't scoring, when grouped up they provide excellent deterrence to the enemy. Crones and mawlocs are both excellent in maelstroms as they have  ignores cover, are tough, mobile, and not shabby in close combat against non-assault units. Finally, I like to have two units in my backfield. One is a venomthrope or malanthrope to protect against alpha strikes, and the other is... a fortification? No its not fluffy, but a Bastion or Void Shield Generator provides excellent defense while your fliers are on the ground, as well as being a very tough unit that can be placed on an objective. Now we all have read the GW faq, but even if you're playing by it, I think a Void Shield provides vital defense for a Flyrant based army on turn 1.

Step 4: Bringing it all together

I won't try to tell you that Tyranids are a secret powerhouse army that can roll through the meta without breaking a sweat. Nids require subtlety, planning, risks, and a bit of luck to use effectively. But I have found that they can be used effectively, and can go toe-to-toe with some of the best armies in the game. All of the above tips and tricks have helped me win maelstrom missions against battle companies, Riptide Wings, Decurions, and worse. Hopefully it can do the same for you!

Thoughts? Feedback? Questions? Are Nids as bad as the internet claims? Let me know how you've been using Tyranids!

Thursday, July 31, 2014

Post-ATC review


To wrap up July, I'll be finishing my coverage of the ATC. If you read my Battle Report of game 6, you know that I ended the tournament with 148 points, enough to land me 13th place and best Tyranids, something I am quite proud of! My team, Orlando Hereticus Beta, finished with 452 points, which landed us with 18th place total. Out of 34 teams, this means that we were just 6 points away from breaking the top half. Not bad, but I certainly feel we can do better next year. Our battle brothers, OH Alpha, finished with a very respectable 520 points, enough to give them 7th place overall, which also made them the top team out of Florida. Awesome job guys! Between both OH teams we actually landed 3 players in the top 20! The Imperial Knight/Necron player from my team ended up taking 9th place, while Alpha's Imperial Knight player took 19th. Alpha played some of the top teams there, and had a very difficult road altogether, so they certainly have a lot to be proud of. My team, Beta, ended up playing the teams that were ranked 3rd, 11, 17, 19, 22 and 29. 

For OH Beta, this was our first time at the event for all of our members, and the first time to a non-Florida GT for all of us as well. To be honest, we weren't prepared for the ATC format. Not everyone can just win the thing their first year! I think that we all brought good lists that were almost all TAC, but I don't think we bought into the Counter system nearly as much as we should have. We also were lacking a single army that we could always throw down, all the time, and not worry about a tough matchup. This meant that every round, at least one or two of our players ended up in a game where they were being "sacrificed" for the Greater Good of the team because no one else could really handle the list they played against. As a Captain, that was a painful realization because we frankly weren't ready for the ATC, but I am confident that next year we can do much better. I was also unprepared for the massive amount of Wave Serpents at the table. All of our players bought hard into the anti armor, and we had Meltas and haywire up to out ears, but none of us had a good answer to Wraithknights or Wave Serpents, due to their freakish cover saves and ignoring Pens on a 2+. In hindsight that should have been an obvious weakness, because Eldar are one of the best armies in the game. I will say that we fortunately were prepared for the large number of Knights floating around, but overall I feel that we will be much better prepared for next year. You can bet that Orlando Hereticus will be back and ready for action! 

Saturday, July 26, 2014

ATC Game 6: TyranKnights vs Grey Knights/Guard

At long last, here we go! Game 6 of the ATC is here. Unfortunately, I have no pictures for this game. I would've sworn I took a decent number, but somehow they are all gone now. I'll blame the Squats on this one! Fortunately my game notes have survived and are not lost, so let's get into it!

For the last round, Orlando Hereticus Beta is matched up against "K-town Riot", a team from (I believe) Knoxville, so quite local! I end up in a Captain smack down, against my opponent Brad and his Grey Knights army, with allied Astra Militarum. Here we go!

Deployment is Dawn of War

Brad's Imperium army list:

Coteaz
Vindicare Assassin
Grey Knight Techmarine, with tons of grenades and Servo Harness 
2 Plasmaguns, Psyker in Chimera
Psyfleman Dreadnaught

2 Punisher tanks (one was Pask)
Ministorum Priest
Platoon Command Squad (3 flamers 1 Heavy Flamer)
30 man Blob squad
Vendetta
Wyvern

My list: 

Flying Hive Tyrant, Devourers, ElectroGrubs
Venomthrope
Zoanthrope
25 gants
3 Rippers, Deep Strike
3 Shrikes, Barbed Strangler, Rending Claws
Hive Crone
Hive Crone
3 Biovores

Imperial Bastion, 3 Barricades, Void Shield

Imperial Knight Errant

Psychic Powers:

Flyrant 1:Catalyst, Paroxysm
Flyrant 2: Onslaught, Psychic Scream
Zoanthrope: Psychic Scream

Warlord trait: Both of us got to choose if it was Night Fight and gained Night Attacker. So yeah, no night fight essentially.

Pre-game: This was a match up I chose because my opponent wasn't very heavy on anti-air weapons, so I was hoping to unleash havoc on him. My general plan is to use the Knight (he has absolutely nothing to stop him) to corral my opponent and dominate board control with the big purple robot, then my Flyers will smash vehicles and hopefully prevent him from getting to grips with me while I steal objectives.

Deployment Tyranids:
I win the roll off and take first deployment. I put my Imperial Knight on my far left flank, opposite of his Emperor's Will objective. Then, my Bastion and 4 Flyers go straight in the middle of the board. Yep, we know how that works by now!

Deployment Imperium:
My opponent puts his entire army on the far top right of the board from my perspective. He is far away from my Knight, but has completely abandoned his Emperor's Will Objective at this point. All 5 Chimeras and the Wyvern are behind ruins, but the Leman Russ are farther up the board. His blob (with all ICs attached) and Vendetta with PCS are in reserve.

Turn 1 Imperium:
I allow my opponent to go first. His Vindicare strips the Void shield and his Psyfleman puts a Hull point on the Bastion, while is Russ Squad opens up on my Warlord Flyrant, dealing 2 wounds. No first blood however!

Turn 1 Tyranids:
All 5 of my big boys run upfield as fast as they can. I perils on my Warlord, but am ungrounded. My Knight, both Crones and one Flyrant open up on Pasks squad, leaving Pask alone with one Hull Point left... I have my Warlord left, and he can either target the Vindicare (a good chance to kill) or Pask (on a 2+ I kill him.) Naturally I target Pask and roll a 1 for Haywire! First blood slips through my fingers... Dang!

Turn 2 Imperium:
Pask guns down my Flying Hive Tyrant for Warlord and First Blood. Blast it! Fortunately he does little else with shooting at my other flyers. However, his Vindicare shoots my Bastion and explodes it! The Venom dies of course. A Vendetta comes in but is ineffective against my FMCs in cover. His blob also comes in, surprisingly on my far left near his Emperor's Will Objective, and near my Knight...

Kill Point Counter: Imperium: 2 Tyranids: 0

Turn 2 TyranKnights:
My Flyrant at full health guns down his Wyvern, and a Crone kills Pask. My Rippers come in, one on my bottom right one on my bottom left. The second forces the Vendetta to jink but inflicts no damage. My Knight charges straight into the 30 man blob, and kills several, but the priest makes all of his Look Out Sir rolls, and so they remain fearless. I also lose two hull points to the Techmarines servo-harness... annoying.

Kill Point Counter: Imperium: 2 Tyranids: 2

Turn 3 Imperium:
Chimeras start firing on my FMCs, and again do little besides a wound on a Crone. His Dreadnaught takes down one Shrike. Then in Close Combat, my opponent casts Hammerhand and his Techmarine strips 4 Hull points with one hit! Hoooly Crap! The Knight stomps around, again failing to kill the priest, but then explodes. Fortunately, my opponent had the chance to consolidate into base contact, and so every single model took a strength D or strength 10 AP 1 hit! Woo! It gets worse when I manage to roll 8 1s to wound, and the Techmarine survives with a number of Guardsmen and Coteaz. At least that fearless priest died!

Kill Point Counter: Imperium: 3 Tyranids: 3

Turn 3 Tyranids:
 One Crone (with Biovore help) goes after the depleted Blob squad, killing the Techmarine, 3 guardsmen and Coteaz survive. That flamer is awesome! My Flyrant deletes a Chimera and puts a Hull point on a second with his Flamer, while my second Crone kills the squad that falls out of the Chimera. My final rippers come in on my right and scatter back into some ruins.

Kill Point Cointer: Imperium: 3 Tyranids: 6

Turn 4 Imperium:
Chimera fire takes my Flyrant down to one wound left, yet he lives! Several plasma gunners also overheat and kill themselves. His Vendetta has no arc to my Flyrant and clips a wound off my Crone on the right.

Turn 4 Tyranids:
 My Crone on the left lands and flames again, killing Coteaz in one hit and two of the guardsmen, leaving a single sergeant left. My Flyrant fails to kill a Chimera sadly. The Crone is similarly ineffective.

Kill Point Counter: Imperium: 3 Tyranids: 7

Turn 5 Imperium:
 My opponent lands his PCS and, with Chimera help, manages to completely wipe out the gant squad that had been edging to the left for an objective in my Deployment Zone. He also kills my Flyrant with his Dread and Vendetta. He also kills a single Ripper brood. Finally, he tank shocks a Chimera forward to contest my Emperor's Will Objective, and my Crone ends up with a single wound left... The Chimera had been previously damaged, however and has one Hull Point left...

Kill Point Counter: Imperium: 6 Tyranids: 7

Turn 5 TyranKnights:
My Crone on the left kills his last blob member and is on an objective, plus in Linebreaker range. My Crone vector strikes his Chimera, killing it, and leaves the table. I jump all over on objectives, and assault and kill the squad that came out of the Chimera I destroyed.

Kill point Counter: Imperium: 6 Tyranids: 10

We roll, and to my dismay, the game goes on!

Turn 6 Imperium:
Another Chimera gets in range to contest the Crusade objective in my DZ but can't reach my Emperor's Will. Due to Line of sight, he is unable to see many of my units and just kills a Biovore as I hide in the ruins. If there's a turn 7, I'll be in deep trouble!

Turn 6 Tyranids:
 My Crone comes in and flames the PCS, killing 4. Rippers make sure the Crusade objective is contested, and my Shrikes jump to get my Emperor's Will objective.

This time, the game ends!

Final score: Tyranids win Purge the Alien 10-6, Tyranids win Emperor's Will 2-0 and win Crusade 2-1. I also claim Linebreaker and Slay the Warlord, while my Opponent slew my Warlord and drew First Blood.

28-4 Major Tyranid Victory! 

Post-game: One the one hand, I am very happy with that victory! If the game had gone on I may have tied both Crusade and Emperor's Will. But, that didn't happen thankfully! Losing my Knight was painful, to a servo harness no less, but it happens. My opponent was very friendly, and I would gladly play him again. I think he played pretty well, but shouldn't have put his Blob so near my Knight. Even though he killed it, he took enough damage that I could finish off the unit with a single Crone, and that single unit was worth 4 Kill points, which helped me immensely. Still, it was a very close fought game even if I won by a large margin of points, and my opponent had me in cold sweat when that Knight went down! A great game. As for my team, we emerged victorious by a score of 80-68. Woo! K-town Riot as a whole was a very enjoyable opponent, and also held the top Necron player of the tournament! 

TyranKnights ATC reflection: On day 2 I had a total of 56 out of 60 possible points, which meant I won best Tyranids player for the event! This was my own personal goal going in, and suffice to say I was very pleased by this. My final score was 148, sufficient to tie for 11th place out of 170! After tiebreakers though, I ended up at 13th place. Still something I was very proud of! On the other hand, I'll admit I was frustrated not to get that 2+ on Haywire to kill Pask turn 1... those 2 extra points would have put me at 150, which I see as a very nice number, and top ten would've also been great! Alas, I must simply strive to do better next year, where I will most assuredly show up with my Tyranids again! In conclusion, here's a pic of my medal and my MVP for the tournament, my Imperial Knight! He may have died 3 times, but he also drew a ton of attention and killed his weight! He punched out a Riptide, another Knight, half a Beast star, tank squadrons and most of a blob. Not too shabby for a distraction unit! Overall I loved how he worked in the ATC format, as he turned my list into a very unexpected one and a curious match up issue for our opponents. 

I'll be posting a tournament recap for the team and some final closing thoughts soon, so stay posted! 

Friday, July 25, 2014

ATC Game 5: TyranKnights vs Tau

The Battle Reports are mounting up! I currently have 8 games I need to write reports for, but the ATC reports get a priority, so I'll have game 5 done by the end of the night! This was a very interesting game and round... a warning, this won't be a pic heavy report in the slightest. 

Our opponents were Skull n Bonez gaming, a rival Florida club. I had never personally played any of their members, but several of my team mates knew their players. I confess I was disappointed to play against a team from the same state, but I suppose by round 5 you can't expect the TO to change the pairings because of it. This is the beginning of the second day of gaming, and so we've all had a night to sleep, and look at the standings that have been put up by the ATC! At the moment, I have 92 points, which is a healthy place to be, and I am currently in the lead for the best Tyranid play!  :thumbsup: Enough of that though, in round 5 I am matched up against Eddie, a Tau player. 

Eddie's Tau list:

Commander with the Works, 2 Marker drones
Ethereal

8 Fire Warriors
8 Fire Warriors

3 Broadsides (2 Railguns, 1 HYMP, 6 Marker Drones, Target Locks)

Riptide (Feel no Pain, Interceptor, Ion Accelerator)
Riptide (Feel no Pain, Interceptor, HBC)

My list: 

Flying Hive Tyrant, Devourers, ElectroGrubs
Venomthrope
Zoanthrope
25 gants
3 Rippers, Deep Strike
3 Shrikes, Barbed Strangler, Rending Claws
Hive Crone
Hive Crone
3 Biovores

Imperial Bastion, 3 Barricades, Void Shield

Imperial Knight Errant

Psychic Powers:

Flyrant 1:The Horror, Onslauhgt
Flyrant 2: Catalyst, Warp Lance
Zoanthrope: Psychic Scream

Warlord trait: I got stealth Ruins, which will come in handy. Note that we treated the Necrons structures as ruins.

Pre-game:
I don't always like to go first, but this game I felt depended on me getting up in the air before my opponent started shooting. On the one hand, my opponent has a TON of firepower, but on the other hand I have a ton of experience playing against Tau. To be fair, most of the Tau I face though don't have 9 Broadsides...

Deployment Tyranids:
I win the roll off to my relief, and deploy as seen below. My Flyers are as far up as possible while staying close the Venomthrope. My knight has his side armor turned towards my opponent so that I could fit him in 12" away from my Crones. 

Deployment Tau: 
My opponent puts one Broadside team on my right and two on my left (with commander) and all 3 Riptides in the middle. He then puts one Fire Warrior team on each side, with the Ethereal with a squad on the left. 

Tyranid turn 1: Uh oh, my opponent seizes the initiative with my flyers on the ground and my Knights side armor facing him... this is just about my worst nightmare!

Tau turn 1: 
My opponent opens fire after some very minimal movement... And he makes a ton of mistakes. He takes two wounds off of my Warlord, and then starts shooting at my Crone... taking off two more wounds. He fires a random Railgun at my Knight and takes off 4 Hull points in one shot!!! Crap! At this point, my opponent suddenly leaves my FMCs alone and targets the Knight, but I save the few hull points he inflicted. 

Tyranid turn 1: 
I was extremely lucky that I didn't lose first blood there! My opponent spread out his firepower too much, he could have easily finished off a FMC if he'd focused his fire. But, now I have a chance! All of my FMCs go 24" forward, I need to pressure him NOW. My Warlord guns down several Fire Warriors and his Ethereal (two kill points), scoring me First Blood! Crone flamers kill a bunch of Markerlights on my right side, while my other Flyrant kills several more on my left. In total, all three units that took casualties fall back! Sadly none leave the board though... 

Kill Point Counter: Tau: 0 Tyranids: 2

Tau turn 2:
 All of his units rally. With my Flyers in the air, his shooting is far less effective. I had positioned my Flyrants nearest to his Buffmanders unit, and thankfully they didn't target the Crones! That would've been brutal. Instead I lose a few wounds but none of my Flyers actually go down! My Knight is also untouched with his AV 13 to the front. My opponent jets his Riptides back, but not far... 

Tyranid turn 2: 
One Crone Vector strikes and kills a Broadside on the right, Flamers kill more Fire Warriors and Markerlights, finishing off the Warriors on the right. Between the Crones and Knight I'm attempting to completely whipe his right flank to give my Rippers a foot hold. One brood comes in there, and I kill his Firewarriors, but leave a Broadside alive along with some Marker drones. Both Flyrants swoop over the two Broadside units there, and massed devourers kill the Firewarriors there, plus a few Markers and a single Broadside. Finally my Knight charges one of his Riptides and completely destroys it! 

Kill Point Counter: Tau: 0 Tyranids: 5

Tau turn 3:
 I'd been surviving so far mostly on Ruin cover and stealth from my warlord trait, but my opponent gets two markerlight hits on a Crone and guns him down. Then, the two left side Broadside units kill my Knight, and take my Warlord down to a single wound (go go Catalyst!) His Riptides again jet away. 

Kill Point Counter: Tau: 2 Tyranids: 5

Tyranids turn 3: 
I bring one Flyrant over to the right side with a Crone and finish off the last Broadside and Markers there. My Warlord peppers his full strength unit with Buffmander but does minimal wounds to no effect. Biovores pick out a Drone here and there. My Rippers land in a central ruin behind LoS blocking terrain and near an objective. 

Kill Point Counter: Tau: 2 Tyranids: 6

Tau turn 4:
 My opponent is able to take out my Warlord with his Riptides, but no more than that. He also puts some wounds on my Crone, but he lives with one left. 

Kill point Counter: Tau: 3 Tyranids: 6

Tyranids turn 4:
 I use Warp Lance on a Riptide (this guy had failed 3 Nova charges!) and take him down to one wound. I then shoot both devourers and take his final wound. My Crone tries to flame his Broadsides but has no real effect. My last Rippers DS in the middle of the board on an objective. 

Kill Point Counter: Tau: 3 Tyranids: 7

Tau turn 5: My opponent moves his more depleted Broadside squad onto a Crusade objective and his other broadsides stay still, while his last Riptide grabs his Emperor's Will Objective. He shoots down my last Crone, but can't kill my last Flyrant. 

Kill Point Counter: Tau: 4 Tyranids: 7

Tyranids turn 5:
 Rippers on my top right and in the middle make sure they are claiming objectives, and I let my gants continue to sit on my Emperor's Will. My last Flyrant lands and contests my opponent's Emperor's Will Objective. Biovores target his forward Broadsides and kill two Drones, they fall back! 

We roll, and the game ends here! We wouldn't have time for another turn anyways though. 

I win Crusade 3-0 with my Rippers. I win Emperor's Will 1-0, and I win Purge the Alien 8-4 (his Broadsides are falling back). I drew First Blood and have Line breaker, while my opponent slew my Warlord. 

Crushing Tyranid Victory 28-2!

Post-game: Despite the lopsided final score, I got very lucky in this game. My opponent was not used to playing Tyranids, and it showed in his target priority. Early on he spread a lot of wounds over different units, which does nothing to reduce their damage output. This allowed me to get all of my flyers airborn and take down his units one at a time by focusing them down. In the end he had 3 units left, one of which was falling back. His low mobility also hurt him a lot, as I was able to maintain my backfield with absolutely no losses while my 5 heavy hitters were able to dismantle most of his army and, most importantly, keep him pinned back while my Rippers dropped all around and in cover. Something that must be said is that I did have good luck after he seized, in that my opponent rolled poorly in both shooting and Nova rolls on the Riptides. If my opponent fails to seize, I believe I win by an even larger margin as my Knight would likely have survived and chopped through the entirety of his army if not for the one Railgun on side armor, and he would've at least earned me Slay the Warlord. 

Wednesday, July 23, 2014

ATC Game 4: TyranKnights vs Astra Militarum

Sorry for the delay! I've had a vacation followed by a family situation, and I haven't had computer access in a few days (no way I'm typing this on a phone!) Enough of that, here comes game 4. At this point I have won two of my games, but my team is still stuck mostly in the middle of the pack. This round, we are paired up against Gateway Gamers. The first list put down is Guard, and I happily match myself up against it! In my experience I do very well against the Astra Militarum so I was confident going into the game. 

This game was Vanguard Strike deployment. 

Michael's Astra Militarum/Inquisition List: 

Company Command Squad, 2 Meltas, Astropath
Tanks Commander Pask (HBolters) with Leman Russ (HBolters)
Psyker
Enginseer

Platoon Command with Missile
Platoon Infantry, Flamer
Veterans, 2 meltas, in Chimera
Veterans, 2 Meltas, in Chimera

2 Wyverns
2 Wyverns
2 Basalisks

Aegis Line with Quad gun

Coteaz

Jifel's TyranKnights

Flying Hive Tyrant, Devourers, ElectroGrubs
Venomthrope
Zoanthrope
25 gants
3 Rippers, Deep Strike
3 Shrikes, Barbed Strangler, Rending Claws
Hive Crone
Hive Crone
3 Biovores

Imperial Bastion, 3 Barricades, Void Shield

Imperial Knight Errant

Psychic Powers:

Flyrant 1: Catalyst, Paroxysm
Flyrant 2: Onslaught, Psychic Scream
Zoanthrope: Catalyst

Warlord trait: I got stealth Ruins. Me gusta!

Pre-game thoughts: Even before the game starts, this is a very very hard matchup for my opponent. He has a ton of Blast weapons, but very little that can deal with my Flyers... his list is geared towards anti infantry but we had no infantry heavy lists on our team. No unique strategy in this one, I'll just protect my flyers for one turn and then start blowing apart his transports!

Deployment Tyranids:
I use my standard template deployment, with all my FMCs behind a piece of terrain for a 2++ cover save. My Knight is right in the corner of my DZ so he has the shortest route possible to get to my opponent! 
Deployment Astra Militarum: 
Most of my opponents artillery is castled behind the Aegis with a blob in front, while the Russ and Chimera are outside of the Defense Line. 

Turn 1 Astra Militarum:
I allow my opponent to go first, and he moves a little and opens fire. He puts two wounds on one of my Flyrants, but ultimately doesn't achieve First Blood. He also puts two Hull Points on the Knight. 

Turn 1 TyranKnights:
I advance all four flyers, going after the Chimers on my right. Devoruers and Haywire are sufficient to kill one, and put a Hull Point on a second model. This gives me First Blood. There is also a hullpoint on a Wyvern from my Knight. 

Kill Point Counter: Guard: 0 Tyranids: 1 


Turn 2 Astra Militarum:
His lone reserves, a Chimera with CCS, comes in. His firepowere is mostly neutered by snap shots, and he kills a few gants with Wyverns. My Warlord takes a wound but is ungrounded, and my Knight loses a third Hull point.

Turn 2 TyranKnights:
Both Hive Tyrants catch the two Russ in a crossfire, taking off hullpoints with Electroshock Grubs and finishing both off for Warlord with rear armor shots. The Crones use their Missiles to take out a Chimera, and my Knight and Biovores pummel the Guardsmen behind the wall. The Knight actually kills the Enginseer with lucky dice and a good scatter! My Rippers all came in and hid out of range of the Wyverns.

Kill point Counter: Guard: 0 Tyranids: 4

Turn 3 Astra Militarum:
 My opponent is swiftly running out of non blast weapons, and has no real effect on me. I do make a mistake and allows his Wyverns to shoot and murder my 3 Shrikes.

Kill Point Counter: Guard: 1 Tyranids: 4

Turn 3 TyranKnights:
 My flyers continue their rampage. One lands behind a Wyvern and kills both. The other takes out a Chimera, the last one. The Knight continues to advance and explodes one Basalisk. Biovores hit the Infantry platoon again and finish it off.

Kill Point Counter: Guard: 1 Tyranids: 7

Turn 4 Astra Militarum: 
Even less shooting accomplishes little other than forcing my Warlord to jink. His Platoon Command Squad backs away from the Knight.

Turn 4 TyranKnights:
 My Knight blows up the last two Wyverns. One Flyrant and the Crone flame and kill the Company Command squad, forcing a Vet squad to fall back off the table as well.


Kill Point Counter: Guard: 1 Tyranids: 10

Turn 5 Astra Militarum: My opponent finally kills my Warlord with Coteaz on a quadgun!

Kill Point Counter: Guard 2 Tyranids: 10

Turn 5 TyranKnights: My Knight and Biovores kill the Command squad, including Astropath and Coteaz. Other Flyers buzz around and he has 3 Veterans left, who go to ground. I also stun his Basalisk.

Kill Point Counter: Guard: 2 Tyranids: 13

At this point, we decide to end the game. My opponent is down to 4 models and would have been tabled in the next turn.

Final score: I won Purge the Alien 13-2, I won Crusade 3-0, and I win Emperor's Will 1-0. I also claim First Blood, Slay the Warlord and Linebreaker with some Rippers, while my opponent slew my Warlord.

Crushing Tyranid Victory 30-2!

There really isn't much to say about this game. He brought a template heavy list, and I countered with a Flyer heavy list. Nothing against my opponent, he was a very friendly guy, but this game was purely determined by lists. He played as well as he could have with this matchup, but there was nothing different he could have done. Our team won this round 90-68, a solid round and a good victory. Up next is team Skull n Bonez, another Florida club!

Saturday, July 19, 2014

ATC Game 3: TyranKnights vs Dark Eldar

Ok, so here we go! Game 3 for me was against a Dark Eldar player with Eldar allies. Our team was matched up against "Make it Rain", and I threw down my list hoping that our opponent's would counter with Dark Eldar. Not a lot of people realize it, but DEldar and Tyranids is now a terrible matchup... for the elves! That was the theory at least, and I couldn't wait to test it out on the tabletop. My opponent was Steve, who I believe was last year's Best Dark Eldar player. Here we go!

The mission was Hammer and Anvil, Fast Attack were two kill points each.

Steve's Dark Eldar/Eldar list:

The Baron
3 Trueborn with 3 Blasters in Venom
5 Warriors , 1 Blaster, in Venom
5 Wyches, Haywire Grenades, in Venom
Beastpack (3 Masters, 5 kymera, 4 Razorwings)
Ravager
Ravager

Farseer on jetbike
3 Jetbikes
3 Jetbikes


Jifel's TyranKnights

Flying Hive Tyrant, Devourers, ElectroGrubs
Venomthrope
Zoanthrope
25 gants
3 Rippers, Deep Strike
3 Shrikes, Barbed Strangler, Rending Claws
Hive Crone
Hive Crone
3 Biovores

Imperial Bastion, 3 Barricades, Void Shield

Imperial Knight Errant

Psychic Powers:

Flyrant 1: The horror, Paroxysm
Flyrant 2: Catalyst, Warp Lance
Zoanthrope: The Horror

Warlord Trait: I got Master of Ambush!


Deployment and turn 1 coming tonight!

Pre-game thoughts: 
I was relatively confident coming into this. My thoughts were that my Knight could handle his Beast Star, I just needed to disable his Haywire units ASAP. Beyond that, Flyrants are amazing and killing Venoms, and I had enough flamer weapons to roast his infantry inside! I also am outflanking both of my Crones thanks to the Warlord trait. In Hammer and Anvil, there will be nowhere he can hide that a Crone couldn't flame a vehicle from the side! If I can get my Knight out front quickly, I'll hopefully be able to stall him and prevent him from overwhelming my lines, and then my FMCs should be able to take out his Venoms.

Deployment Tyranids:
 I deploy first, and do my usual Bastion in the center with a cluster around it. My Knight is all the way on my left. Both Crones are outflanking due to my Warlord.
Deployment Dark Eldar:
 He puts one Trueborn and the Wych venom opposite my Knight. The rest is mostly central, but slightly towards my right. His Beast star has both ICs attached and is right in the middle.
Turn 1 DEldar:
 I think my opponent was surprised, but I gave him turn 1. He isn't in position to do much damage with shooting. All his Venoms advance, but due to Line of Sight he can't use most of his Venoms. He does a single wound to a Flyrant I believe.
Turn 1 Tyranids:
His Wyches got too close! Both Flyrants get in range and flame it. 2d6 hits kills the squad inside, while Haywrie and devourers finish off the Venom. Even better, my Knight makes  charge and explodes his Trueborn Venom, killing one. They then fall back! I score First Blood.
Kill Point Counter: DEldar: 0 Tyranids: 3
DEldar turn 2:
 My opponent is disappointed as both Jetbike squads come in.  He then shifts his entire army away from my Knight! Below is the end of his movement phase.
His shooting lowers the armor value of my Bastion with his Dark Lances. So, he assaults it with his Beasts and destroys it! Yeah, he just killed a Building with birds... The Venomthrope inside dies as always. Other than that, he kills a Shrike with Venom fire and mostly bounces off my Flyers, then turbo boosts his Jetbikes.
Kill Point Counter: DEldar: 1 Tyranids: 3
Tyranids turn 2:
 One Crone comes in on each side. I Vector Strike a Venom and take off a Hull point, flaming the squad inside as well. A Flyrant comes in and uses it's Flamer to finish off both the Venom and the squad. The Second Flyrant kills a second Venom. On the left, my Crone kills a Jetbike with its vector strike. The squad then fails morale and falls off the table! Finally, my Knight assaults the Beast star. I take no wounds, but kill several models. He then hit and runs away.
Kill Point Counter: DEldar: 1 Tyranids: 7
Turn 3 DEldar:
His Beast star assaults both my Zoanthrope and Biovores, Venoms kill a second Shrike and blast away at my flyers to little affect. In assault, he fails to kill either of my units, and I win assault by one! Wow! That really hurts him as I have plenty of Synapse left now. He doesn't hit and run away.
Turn 3 Tyranids:
 My 25 gants and Knight charge into the Beast star again. This time, there are no survivors! My Crones each go after a Ravager and take some Hull Points. Hive Tyrants keep smashing Venoms, and two more venoms die, as well as one squad. (My Rippers have been deepstriking around on various objectives)
Kill Point Counter: DEldar 1: Tyranids: 13
Turn 4 DEldar:
His whole army has stopped advancing, now he is trying just to down some of my Flyers. Again, he isn't able to do much. The squads that have lost their rides run for cover and objectives.
Turn 4 Tyranids:
 I blow up his two Venoms, one is left. My two surviving Biovores kill a Warrior squad. The Knight is too close to my gants and can't move! My gants however open fire and kill two Trueborn, one is left on my Emperor's Will. Both Crones land, but use Missiles to ensure his Ravagers keep jinking. One Flyrant goes after his last jetbike squad and kills them all.
Kill Point Counter: DEldar: 1 Tyranids: 17
Turn 5 DEldar:
He finally kills my Warlord Flyrant, and just tries to put Units on as many objectives as he can.
Kill Pont Counter: DEldar: 2 Tyranids: 17
Turn 5 Tyranids:
 I kill his last Venom with my Knight, as well as his trueborn on my objective. Rippers assault and kill his last trueborn on the other side of the board that had fallen back turn 1. One Crone assaults and kills a Ravager, my Flyrant kills the second one. Finally, Rippers assault and kill two warriors on a Crusade Objective.
Kill Point Counter: DELdar: 2 Tyranids: 22
At this point, my opponent has three Warriors left on the table. There is just no way he can accomplish anything, and so we call the game here.
Final Result: Tyranids win Crusade 3-0, Emperor's Will 1-0, and Kill Points 22-2. I claim Linebreaker, First Blood, and Warlord, while my opponent slew my Warlord.
Major Tyranid victory 30-2!
Post-game: Ouch! That was just brutal. I think this match up was heavily in my favor, but I didn't expect it to go THAT poorly for him. The dice did favor me several times, throughout the game, and overall my opponent rolled below average. Tactically, there's not much to say. Everything I wanted to do, happened perfectly. I just don't think my opponent quite realized how drastically the match up had changed! DEldar vs Tyranids is no easy thing now... My opponent finished the tourney with 136 points, enough for 26th place! A very strong finish overall by opponent. Sadly though, his team won by a score of 82-64.
 Coming up next, Tyranids vs the Astra Militarum!

Thursday, July 17, 2014

ATC Game 2: Tyranids vs Eldar

Alright, here comes Game 2 from the ATC! Game 1, which I put up two days ago, featured a major Tyranid victory over an alliance of Imperial Knight and Astra Militarum. Round 2 saw us matched up against the team "General Staff". For matchups, I was one of the last two players left on my team (along with our Knight/Cron player) when our opponents put down a quite Nasty Eldar list. Both of knew we would fare very poorly against it, and both of us knew we would do quite well against the last list our opponent had, a Daemon build. After  minute of discussion, I decided to fall on the sword for the team. This list was perhaps my worst matchup possible, but I was hoping that I could at least steal a few points and I knew my team mate would have a very favorable matchup now. Indeed, my team mate ended up getting 30 points in his game! But now, on to my own battle:
 
Eldar army list: Alexis
 
Autarch
5 Dire Avengers in Wave Serpent
Wraithknight
Wraithknight
Wraithknight
 
 
My list, in case you forgot, was:
 
Flying Hive Tyrant, Devourers, ElectroGrubs 
 Flying Hive Tyrant, Devourers, ElectroGrubs 
 Venomthrope 
 Zoanthrope 
 25 gants 
 3 Rippers, Deep Strike 
 3 Rippers, Deep Strike 
 3 Rippers, Deep Strike 
 3 Shrikes, Barbed Strangler, Rending Claws 
 Hive Crone 
 Hive Crone 
 3 Biovores 

 Imperial Bastion, 3 Barricades, Void Shield 

 Imperial Knight Errant 


Psychic Powers: 
Flyrant 1: Catalyst, Paroxysm
Flyrant 2: Onslaught, Warp Lance
Zoanthrope: Psychic Scream
 
 
Deployment TyranKnights:
There were plenty of walls that could be hidden behind, which I made sure I did turn 1. My Knight took the far right to be able to advance up field as needed. 
 
 
Deployment Eldar:
My opponent put all of her Serpents in a row, with cover from the walls, and Wraithknights on the ends of the line.
 
Turn 1 Tyranids:
 To be honest, I really hate going first. I really do. But when Serpents ignore cover, I knew I'd potentially be losing two FMCs turn 1, and I really wanted a chance to take first blood. So, I chose to go first. Basically, all 4 of my FMCs ran full speed at her Wave Serpent line, and I used Onslaught to make sure all 4 of my gribblies could focus on a single skimmer. Sadly, after all of that, I inflicted a single Hull Point on the front Wave Serpent... terrible. Between Haywire Missiles, the Knight, and my Devourers, I put 7 Hull points on the sucker, but she jinked almost all of them away with a 3++.
 
Turn 1 Eldar:
 Her 5 Wave Serpents opened fire, and managed to knock down a Crone for First blood. Her 3 Wraithknights then took a Hull Point off of my Knight.
 
Kill Point Counter: Eldar: 1 Tyranids: 0
 
Turn 2 Tyranids:
 I maneuver both of my Flyrants to catch her wounded Serpent, and bring it down with Haywire. The Squad inside is pinned but suffers no casualties. I also deep strike some Rippers behind a wall out of Line of Sight. I then shoot my Knight and actually blow up a second Wave Serpent to my delight.


Kill Point Counter: Eldar: 1 Tyranids: 2
 
Turn 2 Eldar:
My opponent backs up her gunline and keeps blasting away. I get lucky this time and take no casualties, just a wound on a Crone and Flyrant. I also lose another Hull Point on my Knight.

 
Turn 3 Tyranids:
 I fly a Crone of the table, and Vector Strike to no effect. My 2 Flyrants continue to shoot up the Serpents, taking one down to a single Hull point left as she makes all of her Jink saves from Devourers. My Knights shots are all saved as well. One unit of Rippers lands on my Emperor's Will.


Turn 3 Eldar:
 A single Wraithknight fires at my Knight, and takes off all 4 Hull points with one shot, despite my save. Boom! Wow, that really hurt me bad. To make matters worse, one of my Hive Tyrants goes down to her 3 Wave Serpents as I fail all of my Feel no Pain rolls.
 

 Kill Point Counter: Eldar: 3 Tyranids: 2
 
Turn 4 Tyranids:
 My Crone comes on the table, and his Vector Strike does nothing. My Warlord stays in the air and targets her Wave Serpent with a single Hull Point, only for her to again make all of her saves. One Ripper brood pulls around the wall as the final brood lands behind it, but I fail a 4" charge on her Dire Avengers. I also move my gants up to try and assault her Wraithknight, and again fail a short charge.
 
 
Turn 4 Eldar:
She jumps her Wraithknight on my left around and kills a single Shrike but fails the charge, while her 3 Serpents deal various wounds to my Flyers while killing neither. Finally she does some wounds to a Ripper brood.
 
Turn 5 Tyranids:
One Ripper brood assaults and kills a Dire Avenger squad that had been depleted, but I roll a 1 to consolidate and cant make it onto the other side of a wall. My Warlord lands and manages to finish off a third Wave Serpent. I am trying to kill a second Dire Avenger squad but come up empty as one survive my Crones flamer and a single Devourer shooting at the squad. My gant brood finally manages to assault her left most wraithknight and ties it up for the game.
 
Kill Point Counter: Eldar: 3 Tyranids: 4
 
Turn 5 Eldar:
 One Wraithknight makes a long charge and assaults my Biovores to contest a Crusade objective, and a the Wave Serpents combine to kill my last Flyrant and Warlord. Finally, two Dire Avenger squads gun down and assault to finish my Rippers on her objective. Her last Wave Serpent shoots at the Rippers on my Crusade but fail to kill them as one is out of Line of sight.
 
Kill Point Counter: Eldar: 5 Tyranids: 4
 
Due to time, the game ends here!
 
Final result: Eldar win Crusade 2-1, Eldar win Purge the Alien 5-4, Tyranids and Eldar tie Emperor's Will. Eldar claim First Blood and Slay the Warlord, Tyranids take Linebreaker.
 
Eldar Major Victory 24-6!
 

 Post-game review: Yikes! That game went about as poorly as I had feared. Initially I was able to hold my own, but turn 3 the Dice completely abandoned me when my Knight was one shotted. Before that, I was able to deter her Wraithknights from advancing towards the middle, but when he died her Knights advanced and were able to contest one of my objectives. Also, failing to kill that last Dire Avenger hurt me badly, my Biovores were missing all over this game. One more note, this game got very tense between my opponent at a few points. This was mostly my fault, because after a few turn I started rushing to make sure we got 5 in. I don't particularly like losing, and at the end of the game I got very tense as I tried to figure out how to salvage points. This is something I realize I could improve, to make sure the game goes a little smoother at the end. Either way, my team ended up losing this round as well, by a score of 76-82. Very very close! Up next, I face off against team "Make it Rain" and the longtime nemesis of Tyranids, the Dark Eldar...