

So, yesterday a new Apocalypse war zone came out, and for the first time featured two non-Imperial armies! Three, actually, because Warzone: Valedor features an alliance between two Craftworlds of Eldar and the Dark Eldar, against the Tyranids that we all know and love. This book is the usual hardcover from GW nowadays, and comes in at 68 pages in length. The war zone is divided basically into 4 sections...
I- The Violent Death of Valedor:
The first section is just the fluff of the battle. As you could likely guess, the Eldar get most of the screen time, because Tyranids don't have any characters to follow really. The fluff is pretty good stuff, but not riveting. Basically, after Kraken killed 4/5 of Iyanden's population, the collective grief was so strong that the surviving Farseers focused it and opened a warp portal on the nearest splinter fleet that had survived the battle, sucking it into the Warp. Problem solved? Not so fast! A few years later, a slightly crazy Iyanden seer pointed out that they had just doomed the entire Craftworld to a screaming death. Woops! 

So, all the seers traced the Hive Fleet through the Warp, and realized it was about to be spat out in front of another Hive Fleet, Leviathan this time. Why is this a problem? Apparently Kraken had eaten so many Eldar that they had absorbed a bit of the Eldar's collective souls, and Leviathan had eaten a ton of Orks, so if the two fleets were to be combined they would create a ton of highly psychic, really tough gribblies and overwhelm the galaxy. I'll admit this part was a bit weird, because I'm pretty sure hive Fleet Leviathan has eaten at least one Eldar before, and even then, maybe you shouldn't prevent this by sending more Eldar for them to eat. Anyways! Iyanden calls on Biel-tan, who is closer to the planet, Valedor (the Eldar call it Duriel). The Swordwind intervenes en masse and attacks Hive Fleet Kraken's landing sites, doing serious work. Unfortunately, they attract Leviathan's attention, and the massive swarms nearly overwhelm the Eldar. To make things worse, they forget to close the Webway portal completely, and Leviathan follows them into the Webway!
But, then Iyanden shows up, and with a Harlequin ambassador makes a deal with the Dark Eldar, the Kabal of the Black Heart, including wyches from the Cult of Strife. After the whole death of the Galaxy thing is explained, they get along pretty well and do some major work on the ground swarms, contain the infestation of the Webway, and activate a psychic Dark Eldar device that will destroy the planet. It all is going well, planet falling apart, and the Swarmlord is killed when Iyanden opens a webway portal inside of him. Unfortunately, a single Leviathan ship latches its tentacles onto a feeding pool. The only logical response, then, is for the Dark Eldar to use the razors on the wings of their Razorwing fighter jets to cut the feeder tendrils, eventually severing all of them. Actually, this part was badass as hell.
Interesting side note: Hive Fleet seems to have a specialty to produce winged creatures, moreso than any other Hive Fleet. This means than when I finish my Skyblight swarm next week, I get to claim that it's fluffy!

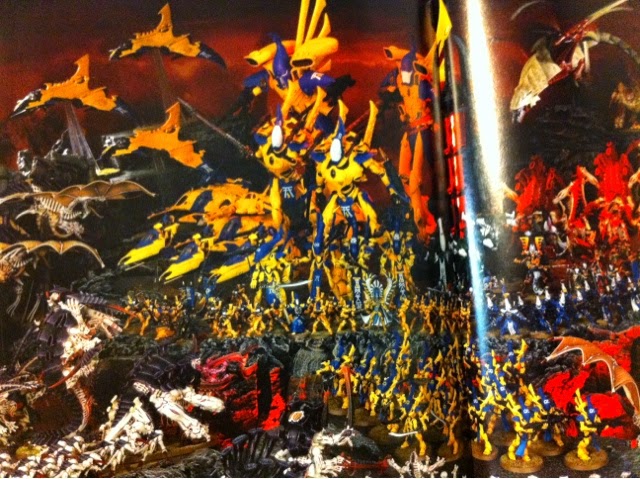
II- Battle Report and Miniature Showcase:
Pretty pictures! Unfortunately, Games Workshop doesn't make Battle Reports up to the standards of DakkaDakka, but they do provide a large fold out of a lava board with two Tyranid swarms closing in, including photoshopped multiples of the largest Monstrous Creatures. Either that, or the studio has 5 Trygons all posed the same way! There's a special Psychic power that the Farseers use to activate the Fireheart, the Dark Eldar device, and there are tons of d3 Victory points that depend on if the device is activated, if there are no Psykers nearby it, etc. Actually, it sounds like a 7th edition mission, which is believable since the book came out 7 days before the new edition. Each side gets a short tactics piece, which shows how uncompetitive the GW team is. Obviously, the Eldar player should have brought 20 Farseers to activate the device turn 1, and then just bought about 60 Wave Serpents to table the Tyranids with. I mean, who brings Howling Banshees? After the mission and one big picture, it is revealed that the Tyranids win by simply grabbing every strategic objective and letting the Eldar activate the Device anyway. That's actually a pretty damn good tactic by the Nids!
There are some random pictures afterwards, the usual 'Eavy Metal miniatures. Somehow, both the Red Terror and Deathleaper appear in the pictures despite never being mentioned. Oh, and the Swarmlord, but he was actually in the story at least.

III- Rules of Engagement:
Up next, is a series of special rules for fighting Apocalypse games on a world that has been infested by Tyranids, and is in the consumption stage. Although I doubt these will see use in a normal game, they are actually pretty cool. They also provide rules for some of the old Forge World Tyranid terrain.
Capillary Towers: Impassable terrain, and have a 36" Shadow in the Warp, except it's the old 3d6 one. Combine this with -3 Leadership and laugh maniacally!
Spore Chimneys: On a 5+, they release d3 clusters of 3 Spore Mines that deep strike nearby. They also give a Shrouded to nearby Nids, within 6".
Digestion Pools: Lethal terrain that inflicts hits on enemy units within 2".
Then, there is table where you roll a d3 and add the turn number. This involves the Master of Disaster picking units to suffer damage, depending on the result. A 2-3 ends in 2d6 Strength 3 Ap 3 hits for alternating units equal to d3+1. A 4-5 results in d3 Poisoned Apocalyptic blasts, and a 6+ is a strength 10, Instant Death Apocalypse Blast. Ouch!
Several special missions are given for the various points of the battle, including one where you can ram Razorwings into Capillary Towers. I've got to try that!
There are then 9 Strategic Assets, including 5 for Tyranids. These are all pretty decent, including one that speeds up all of your winged units, or gives all units the 6 result on Instinctive Behavior. Pretty cool, but not broken. Finally, we receive a "Finest Hour" moment for Yriel, Asurman and the Swarmlord. The Swarmlord can just give his units Outflank and Acute Senses. I guess this is pretty good to outflank a ton of Gants on one side.
Tyranids get a ton of Formations here. These are designed for all Apocalypse games, or for themed Valedor games. Unfortunately, these can't be used in normal games, even though half of these are smaller than Skyblight. Of course, if you can get your opponent to agree, there's no reason not to use some of these. Personally, I would allow my opponent to include one of these at the cost of a Lord of War slot if I had a Lord of War myself.
The Cronecoven: This one is nice and simple. Take 3 Crones or more, and Vector Strike the same unit. For each Crone after the first, add +1 Strength, to a max of ten. (8/10)
This would be very nice if I knew my opponent was going to have Titans. If you get the strikes off, it's going to be some MAJOR pain for whatever unit takes all those strength 10 hits. Knights, Warhounds, whatever, will be crippled if you pull this off.
Eater-Swarm: 3+ Haruspex, 3+ Pyrovores Broods and 5+ Ripper Broods... Wow. GW took the worst models in the book and put them all together. At least they get outflank... as a side note, they always roll the middle result on Instinctive Behavior, and enemy Characters take -(Game turn) to their Leadership if they can see any model in the formation. That part is nice, but it isn't worth buying 3 Pyrovores for, especially because it has no impact on the normal infantry. (3/10)
If you must use it, try combining with the Swarmlord. Use his Finest Hour to put Acute senses on the whole formation, and maybe, just maybe, you can do something useful with it.
Eye of the Hive: This formation is at least 3 Warrior Broods, each which must have 5 models in it. Roll a d3 at the beginning of the game, and every unit that arrives after that turn gains Preferred Enemy to one codex. Also, units within 18" get to attack even if they are killed in close combat before their Initiative step. (6/10)
The strike after death part is very potentially useful. Personally, I would use this to throw some sacrificial Carnifex at a mega-CC unit, or a bunch of poisoned gants. Basically, if your opponent has a super-CC unit from Apocalypse, this is a good way to deal with that.
Harpy Skyhaunters: This one is pretty cool, it includes 3+ Harpies and 3+ Spore Mine clusters. Basically, Harpies firing at a Flyer within 12" of a Spore Mine get Tank Hunter. Useless? Not wuite. Any Harpy can fire their main gun as what is basically a twin-linked Autocannon with Skyfire. With all those rerolls this could be a pretty good anti-flyer, especially with all those Harpies. (6/10)
This is very simple to use. Just line up on any enemy Flyers you see, and Deepstrike some Spores right next to them! Then, unleash all those shots on that chosen flyer, hopefully taking it down. It's not going to kill a superheavy flyer all by itself sadly, but could take down an Armor 12 vehicle with average rolls.
Kraken Tendril Swarm: This includes 1+ Warrior Broods, and 3+ units of Gants or Gaunts, plus 0+ units of Gargoyles. The Gaunt units must have 20 models or more. The formation may, once per turn, make a 60" move that can't go within 12" of an enemy, but they may shoot afterwards. Also, every unit gains Outflank and Acute senses. (7/10)
Most people can field this easily, and you can use it to surprise a flank or grab objectives. Pretty nifty! I would use Devourer Gants for this, and throw in some extra Gargoyles just for fun.
Leviathan Sky Swarm: This is honestly my favorite formation of the book, and the one I REALLY wish we could use in a normal game. It includes 1+ Flyrant, 3+ Gargoyle Broods, 2+ Harpies, 0-3 Shrike Broods and 0-1 Harridans. The rules are ace though! First off, the entire formation reduces scatter to avoid mishapping. Second, the Gargoyles may assault Flyers! For each Gargoyle in base contact, roll a d6. On a 1-3 kill a Gorgoyle, a 4-5 nothing, and on a 6 the Flyer takes a Hullpoint. That's the kind o flavor the Tyranid book was lacking! Finally, any unit with Skyfire reduces their ballistic skill by 1 when shooting at the formation. So if they're already snapfiring at say, the Gargoyles, then that BS1 goes down to 0, and it's the normal -1 if shooting at a Harridan. That is just way too awesome! (9/10)
If you have the models, you may as well put a harridan in, because why not make him harder to hit? Also, put all of your Flyrants in the formation, because there's no limit on the number. Scattering Gargoyles around will scare any flyer away. This formation is great, and the more wings you have the better.
Sporestorm Brood: This interesting formation is 1+ Biovore unit, 1+ Exocrines, and 3+ SPore Mine clusters. First off, the SPores must Deepstrike and can reroll the scatter dice if within 12" of a Tyranid model. Exocrines are twinlinked when shooting at a unit within 6" of a Spore Mine, and oddly Carnifexes reroll to hit AND wound when within 6" of a Spore. Yes, Carnifexes, even though they're not in the formation. This isn't an accident, as Carnifexes are mentioned in the short fluff piece. (7/10)
This feels like it's a normal formation, not an Apocalypse one. Still, it's quite good. Just drop some Spore Mines near whatever unit you want dead, and start layering it in Exocrine fire. Also, this could make ranged Carnifexes pretty decent. Twinlink all their weapons by putting a spore nearby, and they reroll to wound. If you happen to run melee fexes, this will also spice them up a ton. Just wait till you're about to charge, and poof! Drop in their support mines. This actually makes Spore Mines super attractive.
Tervigon Broodnode: This is my second favorite Formation. It includes 3-5 Tervigons, nothing else. The rules on here are awesome! First off, one Tervigon may choose what gun their gants spawn. This basically means you are creating Devourers all the time, which triples their firepower! Better yet, when spawning, you roll the dice for every Tervigon, then choose one of the results to apply to every Tervigon in the formation. At the base 3, this cuts the chance of doubling to something like 1/8 of what it was. And the more Tervigons you have, the more the odds go down! But, here's the REALLY interesting part... "All Tervigons in the formation must have the Catalyst and Onslaught powers". What the heck does that mean? Do they automatically get the best two powers in the table? YES PLEASE! The wording implies that they don't just get it, but that they must take it... what does this mean for 7th edition? Potential to choose powers? (9/10)
This is the ultimate objective taker. Three MCs which can score, and the amount of gants coming out of this formation is ridiculous. Also, they get some ace Psychic powers! I would either park all three on a crucial objective or outflank the whole formation with Hive Commander. Damn, this is sick!
Tyrannofex Gunbeast Brood: This one is plain and simple, but good. 3-5 Tyrannofex, at least two must upgrade their Acid Spray to another gun. If one model hits a unit, it is marked. Every other model then is twin-linked, ignores cover and has Tank hunter against that unit! (8/10)
The best way to run this is 3-5 Rupture Cannons. Once you get that hit, the rest of the brood will brutalize any vehicle target. Twinlinked, tankhunter, ignores cover, Strengyh 10 guns? This is our formation for hunting Titans and superheavies. Nasty, nasty, nasty.
The Shadow Incarnate: 1 Hive Tyrant, 3 Tyrant Guard, and 2+ Zoanthrope broods. Double the range on Shadow in the Warp, and all Nids within 24" gain a +3 Deny the witch. Lovely! This is major anti psyker power, but there's one other rule, a Psychic power... A nova of 6" times the number of psykers in the unit, which will be at least 3. Add more broods, and you can get a massive Nova power! Each unit hit takes 10 hits at strength 2, Ap 1, that Blinds and is Pinning. This is incredible for dealing with infantry! But it's a Warp Charge 3 power... how can a Tyrant cast it? I'm guessing that this will be dealt with in 7th edition. (7/10)
Sadly, this power could hit your own units, again pending 7th edition. Otherwise, this is pretty brutal if you get it off successfully, and is great at neutering psykers anyways before you include the power.

Conclusion:
This book is pretty cool for about $26 from my local retailer. Plenty of nice fluff, but nothing outstanding. It also covers the stages of a Tyranid invasions, and some nice special rules for a Nid-infested planet. If you play Tyranids in Apocalypse, then the formations in this book are absolutely amazing. Seriously, if you play Apoc and have a Nids army, you need this. Note that there are Eldar and DEldar formations in the book, I will update this article shortly with those included. Also, it's amusing that plenty of these formation could fit comfortably into a normal 40k game. I wish!
Just wandered here from your link on BOLS - very nice work with the review, I'm actually considering getting this now!
ReplyDeleteThanks :D