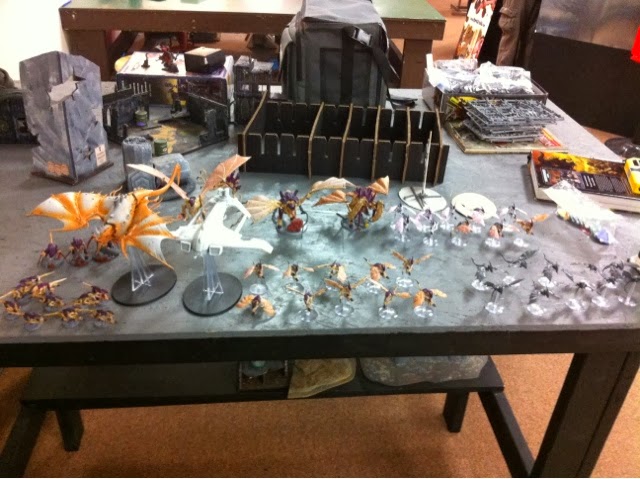
Competitive 40k tactics and Battle Reports with the Tyranid Codex

Wednesday, March 26, 2014

Crucible game 2: 2000 Nids vs Farsight Tau

My Army List: 

Flyrant, Devourers, Hive Commander 
Flyrant, Devourers 
Flyrant, Devourers 

30 gants 120 
10 gants 40 
10 gants 40 
Tervigon , Electroshock Grubs 205 

Venom thrope 45 
Zoanthrope 50 

3 Biovores 120 
Exocrine 170 
Tyrannofex 175 
Tyrannofex 175 

Bastion 
Bastion

Game 1: After a very disappointing Game 1, I was very angry. Fortunately, I play well when I'm angry! In order to get back into the tournament here, I really needed a solid victory. For better or worse, I drew up Tau as my next opponent... many people hate playing against Tau, but I have tailored my list specifically to deal with the most commonly seen Tau units. Hopefully I can prove that now...

His list was as follows:


Commander Farsight:
Commander Torchstar ? (ignore cover guy)
Commander Puretide ? (Puretide chip guy)

3 Crisis suits, max Marker drones, two Missile Pods each (Torchstar here)
3 Crisis suits, drones, 2 plasma each
3 Crisis suits, drones, 2 Fusions each

Riptide with Ion Accelerator
Riptide with HBC, skyfire (Puretide here)


The mission: 20 points total, the GT was purely battle points

Hammer and Anvil

Primary (8 points) : Each turn, an objective scattered 4d6 from the center of the board, worth points equal to the turn it arrived. Elites are scoring.
Secondary (5 points) : Kill Points, Elites and Troops only.
Tertiary (3 points) : Each Monstrous Creature and vehicle is worth 1 point, 2 if flying.
Plus four Bonuses (1 point) : First Blood, Warlord, Linebreaker, Last Blood

Psychic Powers: 

Flyrant 1: Warp Blast, Paroxysm (reroll reserves)
Flyrant 2: Psychic Scream, Paroxysm
Flyrant 3: The Horror, Psychic Scream
Tervigon: Dominion
Zoanthrope: Paroxysm

I win the roll off and give first turn to Tau:

Pre-Game Analysis: I really hate Tau, but he has no clean answer to my list. Shove Flyrants down his throat and running two Tyrannofex up the board may be enough to overwhelm him. Here's hoping! The Primary favors staying close to the middle, so once I remove his markerlights I should be just fine in my Venom bubble.

Tau deployment: Farsight/Meltas will deepstrike. Two RipTides on the left, the MarkerSuits up front, Broadsides kinda obscured by his hand, and the plasma suits are to the far right behind a wall. (Note that the suits in the back right corner are the Fusion guys in reserve).


Deployment Tyranids: I'm clustered up, taking cover where I have it, and thoroughly enjoying a 2++ cover save on almost every model. He'll be able to hit maybe one or two units before the hammer falls! 


Objective 1:

Scatters in between us, to my left. It's fairly neutral zone, I doubt he'll advance for a 1-pointer. 

Turn 1 Tau:

He advances many suits, making me very hopeful... Markerlights target my Exocrine and he loses 4 wounds. However, he is then out of ignores cover and can't penetrate my 2++ cover! Muahaha. However, realize I'm stupid when he targets the Zoanthrope on top of the Bastion and removes it for First Blood.


Not shown above, but he leaves his second Riptide in front of his Aegis... 

Turn 1 Nids:

My 3 Flyrants all advance the minimum 12", all in terrain with shrouding. My wounded Exocrine advances slightly as well. Beyond that, I spawn and spread out my bugs so that he can't melta my Bastion. 3 Flyrants and the Exocrine focus fire on his Ion Accelerator Riptide, and I kill it!  

Objective 2:

Stays in between the two Deployment zones, but to my right this turn. So far nothing has favored one side or the other. 

Turn 2 Tau:

His Farsight squad land off my front line and targets a Tyrannofex. I have cover and so survive the wave of Plasma. Shooting from all over kills none of my MCs but seriously wounds my up front TFex. Below you can see his Farsight squad as well as my bubbled up Bastion.


Then, he jumps back his Plasma and Melta squads. So many suits...


Turn 2 Tyranids:

All three Flyrants spring forward, and I open fire with my advancing MCs. All of his markerlights are killed, and I also take down several crisis suits. One Flyrant guns after his Riptide and does 2 wounds, but I stay airborn. 

Objective 3:

Stays in between the two Deployment zones, and to my left. Very close to the 1-pointer. 

Turn 3 Tau:

A lot of desperate shooting sees two out of my three Flyrants gunned down, but that's all. He also had no firepower to spare towards the hammer running downfield at him...


Turn 3 Tyranids:

Instead of assaulting, I vector strike Farsights squad with my Flyrant and end up in the far bottom right. I could either shoot or run off the board...


I advance both of my Tyrannofex, and two flamers plus the Exocrine kill his squad and take Farsight down to one wound. I shoot him with the last Flyrant, and claim Slay the Warlord. 

Objective 4: It is slightly towards my opponents DZ, but again to my left. It seems that's where I need to go... 

Turn 4 Tau:

His Missilesides and Plasma suits are his last units behind the Aegis. He successfully takes down the wounded Tyrannofex. His buffmander and Riptide advance towards my left to start trying to kill my gants. The missilesuits with commander are behind the Riptide, hiding to score.


Turn 4 Nids:

My last Tyrannofex advances, and flames some drones away.


My flyrant leaves the table, and vector strikes a plasma suit on the way. Random Exocrine shooting takes the Riptide down to 2 wounds. 

Objective 5:

This scatters towards my opponent, out of both of our reaches. 

Turn 5 Tau:

His Riptide and Missile suits make a rush for the objectives, and after his jump move he grabs the 4.


His shooting kills the nearest two gants units, but my Tervigon is happily pumping them out. 

Turn 5 Nids:

My Flyrant comes back on, and survives Interceptor to kill his Riptide. random shooting can't finish off the Missilesuits. However, Biovores kill some drones and his plasmasuits fall back!


Finally, my Tyrannofex assaulted and kills his Broadsides. Gant positioning means I will narrowly take the primary if the game ends... 

Tau turn 6:

The game must go on! His last Missile suits hold down the 4, and shooting takes some more gants down. His commander splits off and contests.


Tyranid turn 6:

The Tervigon assaults his Commander, who lives barely, but I hold the one pointer with her. The Exocrine and Flyrant kill two suits, the last is finished in assault. 

Tau turn 7:

My opponent calls the game. Two falling back crisis suits are far from the battle, and his last commander is in CC with an MC, and very unlikely to last. Other than that he has no models, and no capacity to score or contest.


Final result:

Primary (objectives) : Tyranids 3-0
Secondary (Kill Points) : Tyranids
Tertiary (Kill points MCs) Tau
Bonuses: Tau FBWL Tyranids: WL, LB, LB

Final: 16-5, solid Tyranid victory!


Post game:

As much as I hate Tau, that went very well. Despite a late push, he never had a chance to break my backfield with the Bastion anchoring it. Because the Venomthrope lived, his damage was blunted and he could really only target the things I sent after him, never my gants or Tervigon or Exocrine. The Tyrannfofex and Flyrants were ace, being very clutch and hard to kill. The Exocrine also easily pulled his weight, finishing off two Riptides! Very happy here, despite giving up first blood.

Thursday, March 13, 2014

3/10 Skyblight 1850 vs Tau

Alright! I'm afraid I'm interrupting what should be my Crucible Battle Reports, to bring you a test report... with the new Skyblight formation for Tyranids. If you follow the forums online, there is much wailing and gnashing of teeth over this formation. It was overshadowed at first by the Imperial Knight, but now people are realizing its supposed power. A brief rundown...

Flyrant
Crone
2 Harpies
3 Gargoyle broods

Each gargoyle brood scores, and cannot be contested. Also, each brood killed returns on a 4+ the next turn. 

On to the report!

My list: (Yup, proxies... the Tau flyer is a Crone, two empty bases are Harpies)

Flyrant, Devourers, Adrenal Glands
Flyrant, Reaper of Obliterax, Adrenal Glands

Venomthrope

10 gants
3 Warriors, Barbed Strangler

Crone
Crone
Harpy (Venom Cannon)
Harpy (Venom Cannon) 
10 Gargoyles Adrenal Glands


My opponents list: 

Buffmander (ignores cover) with IA Riptide
Buffmander (Iridium Armor, Drone Controller) with Markerdrones
Riptide (IA)
Riptide HBC, Velocity Tracker
6 MarkerDrones
10 Fire Warriors
10 Fire Warriors
9 Fire Warriors
2 HYMP Broadsides with Missile Drones
SkyRay gunship
5 Pathfinders
2 Plasma Crisis suits

The Mission: We play a dual-primary with the Relic and Emperors will, plus the usual bonus points.

Psychic Powers: 

Flyrant 1: Onslaught, Psychic Scream
Flyrant 2: The Horror, Paroxysm
Flyrant 3: Onslaught, Paroxysm

Warlord Traits: I can make forests carnivorous, he gets a 3d6 jump move. 

My opponent wins the roll for turn 1 and elects to go first...

Pre-game: My opponent and I both fully expect that I will steam-roll him. My opponent is a good player with a good list, but there are assumptions that the list I'm bringing is broken. So, we're both laughing and having fun, as this is a test, not bragging rights. 

Deployment Tau: He puts his objective on the far left in a ruin. One broadside unit in each corner and the IA Riptide to the right. HBC to the left, with markerdrones, markerlights and the SkyRay there as well. Then two FW squads are deployed far back in the center of the board, with the third on his objective. Crisis suits will deepstrike.

Deployment Nids: See below, 10 gants in reserve, as well as all the Gargs deepstriking. 7 FMCs behind a Bastion... 


Tau turn 1: He moves little, but opens fire... with his markerlights and ignoring cover, he kills a Warrior and both Harpies, netting him first blood.

Tyranid turn 1: Restraint is for the weak! I throw all my MCs forward. I successfully take out all the missile Drones on the right, and his Broadsides ball back. Then, an Onslaughted Crone runs behind his Iridium commander and flames the markerdrones out of existence. More flames and dakka kill a few Fire Warriors and wound the buffmander twice.

Tau turn 2: (see below for movement phase)


His HBC riptide and some firewarriors kill one Crone. Then, his Skyray and the Plasmasuits kill the CC Flyrant. Other shooting takes my second Crone down to 1 wound remaining.


Tyranid turn 2: I'm close and personal now! One Gargoyle Brood deepstrikes, but an Intercepting Riptide kills 9 of them! The second lands untouched.

One Flyrant shoots a Riptide and assaults it. He loses two wounds, I take one.


The second Flyrant strips a wound off the other Riptide and assaults, losing no wounds in return.


The Gargoyles and a Heavy Bolter kill some Fire Warriors, they will fall back off the board. The last Crone assaults and kills the second Fire Warrior Squad.


Tau turn 3: With no real targets, he kills all of the Gargoyles. In CC we beat away at eachother, he has a 3++ on both Riptides.


And here he inflicts two wounds with the Riptide!


Tyranid turn 3: I scatter my last gargoyles but avoid a mishap. Sadly, I fail to bring back either of the two broods. I scatter some shots around, but again not much happens.


Tau turn 4: He shoots all of my Gargoyles down. In the far right combat, his Riptide AGAIN hits twice, and kills my Flyrant! Holy Crap! I had inflicted only a single wound, as he has been red hot on his Feel no Pains and his Nove charge rolls.

Tyranid turn 4: I put my warriors on top of the Bastion, and kill some fire warriors but they pass morale. My gants come on the board on my objective and cower. Then in CC, I wound his Riptide twice. With one wound left, he passes both feel no pains and then proceeds to beat my Flyrant to death!  Oh crap oh crap oh crap oh crap!

Tau turn 5: His one wound Riptide fails his first Nova Charge, and then makes Feel no Pain. Crap. He kills 6 out of ten gants and pens the Bastion with the other Riptides shot, reducing the Armor value by 2. Other random shots are ineffective.

Tyranid turn 5: I am stunned at how this game has gone. All 7 FMCs and all of my gargoyles have been killed beyond resurrection. At this point I have 4 gants, 2 Warriors, and a 1 wound Venomthrope hiding in and behind a lone bastion. With Riptides closing in, I stand up the Barbed Strangler and take a potshot at his last Fire Warrior unit... He goes to ground and only loses one! One short of that sacred morale check... Then, the Venomthrope takes a moment to shoot the Heavy Bolter, killing a Fire Warrior. They fail morale!

I roll, and miraculously the game ends!

I hold my objective, while he holds none, and the Relic is not held. He has Warlord, First Blood, and... not Linebreaker! He never quite got his Riptides close enough, leading to a 3-2 Tyranid victory!

Post game analysis: Despite the victory, I took a huge beating. All my monstrous creatures dead, all my gargoyles gone... this game was whacky and completely unexpected. My opponent had some luck, passing 9/10 Nova Charges to maintain his shield, and passing more than half of his FnPs while in combat with the Hive Tyrant, plus all of my Gargoyles failing to return. His to hit rolls were also pretty great, in CC his Riptides needed 5s and yet BOTH beat down their respective Flyrants, both of whom started at full health. It was impressive to see Tau blazing away at all the wings, but shocking that it worked! My tactics were pretty poor I think, testing out the new list I acted way too boldly, and most of my FMCs got shot to heck and back. Getting first turn would have been huge, but given this result I must say the Skyblight is not broken... it is good, and with slightly better dice could do VERY well at a tournament, but this is on par with Flying Circus, Taudar, and WraithCrons, not miles above them as some people say.

Thursday, March 6, 2014

Crucible game 1: 2000 Nids vs Necrons


First off, the event was an absolute blast! Tons and tons of fun, many great opponents, and a highly memorable guest star by a Crimson Fist! He had an absolutely mind-blowing costume. 

My Army List: 

Flyrant, Devourers, Hive Commander 
Flyrant, Devourers 
Flyrant, Devourers 

30 gants 120 
10 gants 40 
10 gants 40 
Tervigon , Electroshock Grubs 205 

Venom thrope 45 
Zoanthrope 50 

3 Biovores 120 
Exocrine 170 
Tyrannofex 175 
Tyrannofex 175 

Bastion 
Bastion

Pre-tournament Tactics: 

Many people will find my list a little odd in some aspects. Dual Bastions and a lack of Mawlocs and a lack of Crones... My logic on the Bastions is simple. One is designed to hold the Venomthrope, the other will be placed as far forward as possible as a Line of Sight blocker... sadly, many of the local stores here have very little in the way of True LOS blocking terrain, and I really really wanted some! I'm also not a fan of the too-random Mawloc. Instead I wanted an uber durable army list... specifically, I designed this list to counter Tau and Eldar. Tyrannofex are a big matchup problem for MissileTau, which have become very very popular. Venomthropes will also neuter Eldar rending weapons while a 2+ save laughs off the Serpent Shield. Both Tau and Eldar have very little to deal with a Bastion at range, so I am confident in my ability to keep the Venom alive. Flyrants and Biovores should be self-explanatory. I'm also a big fan of the Tervigon as a backfield unit, it is still tough as mess to kill in an objective game. The exocrine is also a fun unit thanks to the lovely AP 2. My tactics will revolve around Bastion placement allowing me to seize the middle and be incredibly hard to shift. Many of the missions revolve around a central objective or controlling the board, so I'm happy. 

Game 1: I was ready to go! I finished painting yesterday, including two Bastions that I bought at 8 pm! My opponent was a fellow named Jonathan, and one who I know is a [i]very[/i] good Necron player. At BeakyCon (where I took best of the Silver bracket) my opponent took second place in the Gold Bracket. Certainly not to be taken lightly! I'd never actually met him however, so I had a good opportunity to play a high-caliber opponent. 

His list was as follows:


Necron Overlord, Warscythe, 2+, Phaeron, MSS
Despairtek
Despairtek

5 Deathmarks
5 Deathmarks
6 Wraiths
6 Wraiths

8 Warriors, Ghost Ark
7 Warriors, Ghost Ark
5 Warriors, Night Scythe

Annihilation Barge
Annihilation Barge

The mission: 20 points total, the GT was purely battle points

Hammer and Anvil

Primary (8 points) : 5 objectives, in the center of each table quarter and the board, Heavy is scoring
Secondary (5 points) : Each scoring unit, troops or heavy, is 2 points if destroyed and 1 point if below half strength
Tertiary (3 points) : Pick an opposing troop, if you kill it you win the mission, if both do it's a tie.
Plus four Bonuses (1 point) : First Blood, Warlord, Linebreaker, Last Blood

Psychic Powers: 

Flyrant 1: The Horror, Paroxysm (Trait: -1 to enemy reserves)
Flyrant 2: Catalyst, Paroxysm
Flyrant 3: Catalyst, Warp Blast
Tervigon: The horror
Zoanthrope: Dominion

The table:


You can see it long-ways here (with my army case on top haha) the short edge closest to the cam is my Deployment zone, pre bastions.
I win the roll off and take second turn.

Deployment Necrons:


His deathmarks start way back for a turn 1 jump, otherwise he is symmetrical and ready to advance! Scythes in reserve, plus a Lord/Warriors in each Ark

Deployment Tyranids:

I'm bunched up, with my Flyrants all by table edges to dissuade his Deathmarks hopefully, but every unit has venom Shrouded on it for some good cover. Note 30 gants stretched all up front, he will have to assault through them with his wraiths.

Turn 1 Necrons:

Nothing pic worthy really. He marks my Warlord and a separate Flyrant, then tries to DS nearby. I thought this was a little bold, as my placement meant scatter would likely result in a Mishap. Fortunately, both Deathmarks Mishap! One enters reserves, while I place the other 13" away from my Exocrine. With nightfight on, I have a 2+ cover and he elects to run them into a non-blast shaped formation. Other than this, he advances a bit with all models

Turn 1 Tyranids:


I don't advance much. Psychic powers all over (note that I specifically don't cast Dominion on the Zoey, and all my Synapse is on the far left. One Flyrant advances slightly, another goes a full 24 past his battle lines. Warlord leaves the table. His wraiths would need an 11 so I think it's a worthwhile risk.

The Exocrine and a Flyrant blow his Deathmarks to heck, granting me [b]first blood[/b]. I do a random wound to a Wraith on the right.

Turn 2 Necrons:  One Scythe comes on and lines up my forward Flyrant. The Deathmarks land in his zone as he has no good targets. Then, His two wraith squads come a full 12" up for a potential charge! Only my 30 man gant squad is really in range however.
Shooting, my Flyrant easily weathers the Night Scythe and first Annihilation barge with no wounds taken. Then, the second Barge fires...


Yep, those top dice are his to hit roles... 6 snap shots yields six 6s for a total of 18 hits! Son of a... Ow! Naturally, 18 hits murders my Flyrant into the ground as he fails 4 saves and all of his FnP rolls. What a stroke of the dice!
He follows this up by assaulting 12 wraiths into my 30 man gant blob.


 He looks immensely pleased that they survive with 8 guys left (actually killing 2 wraiths in the process, one was wounded before). Then, I point out that I had wheeled my entire synapse around, and the gants fall back, escaping his sweep easily. His wraiths are now in the middle of my lines!

Turn 2 Tyranids:  My Flyrant and 10 gants come in by his 4 man wraith squad, causing my gants to auto rally. I open fire with 10 gants, 8 gants, a Flyrant and a Tyrannofex, successfully killing his 4 man Wraith unit.


After:


On the other flank, I shoot at his wraiths with a Heavy Bolter, 10 gants, the Exocrine and a Tyrannofex but spectacularly fail to cause any wounds. Biovores target his Deathmarks and I take out his Cryptek so they can no longer teleport. My second flyrant swoops up and shoots his Night Scythe, inflicting 3 penetrating hits and 2 glances. He jinks, and only a single glance makes it through...  :facepalm: A Tyrannofex then assaults the 6 wraiths (a quick averages means he'll rend twice) but I am rended three times. Still, I have locked his wraiths in combat for a while. Finally, a Tervigon outflanks on the right, taking his objective and throwing some gants out in front of her.

Turn 3 Necrons: We both suddenly realize we haven't marked our troops for the Tertiary! He declares my Tervigon (d'oh! I wouldn't have outflanked her, but ah well.) and I declare the 5 warriors in his Night Scythe on the board. His second Scythe comes on, and that plus an Annihilation barge takes down my second Flyrant after I fail my first grounding check and 4 out of 6 saves, plus all 4 Feel No Pain rolls.  His original Scythe targets my warlord (who was not flying) and thankfully he survives.


More bad news, his overlord and 8 warriors drop out of a Ghost Ark and assault my Tervigon! I thought her safe, but apparently Ghost Arks are open-topped? I had no idea they were, a crucial mistake! I only take one wound and kill a warrior in return. In CC his wraiths and my TFex continue to flail around.

Turn 3 Tyranids: I paroxysm his wraiths to WS 1, then assault with an Exocrine, 10 gants and 8 gants. 6 smash attacks from the MCs spectacularly fail to roll a single  hit on 3s, but my gants kill one. In return he kills many gants and wounds the Exocrine. My Flyrant hides behind a Bastion and shoots his Night Scythe down, and I advance my Tyrannofex towards the center objective. I'm trying to lure his Warlord in to assault me... In CC he finishes off my Tervigon between Mindshackle and 4 Warscythe wounds.

Turn 4 Necrons: He takes the bait and his warlord and warriors jump the Tyrannofex!  I survive with a few wounds left but he is there for a turn. The wraith brawl in my lines is awful as again the gants kill a Wraith while my MCs whiff completely. His other Scythe darts around.

Turn 4 Tyranids: Here's my plan: I assault the Warlord with my Flyrant, and challenge. He has no invulnerable so he must decline or get beaten into the ground. Then, two MCs mulch his Warriors and my Flyrant sweeps them if they break, breaking his troops and leaving a 4 wound TFew on the center objective. He has nothing that can really touch the TFex at range and his wraiths are locked, plus his other Lord is far away. One snag in the plan... I fail my 4 inch charge with a 3! Here's another crucial mistake. Neither me nor my opponent realized that every player received a single mulligan for the GT. I frankly would have used it right there! To make things worse, I fail mindshackle and my TFex is scythed down. In the other CC his wraiths again slowly whittle the gants while the gants kill one. If my MCs had stepped up I could have crushed them by now! In other news, my Biovores deleted his 5 man warrior squad, my chosen troop.

Turn 5 Necrons: My grouded Flyrant has 0 chance and is shot off the board. He drops warriors on my objective, I go to ground with Venom cover (I disembarked him last turn) and fail FOUR 2+ cover saves... argh!


MCs and wraiths wail away and he maneuvers onto objectives.


Turn 5 Tyranids: I shoot his warriors and kill two, one stands up, and assault with the venomthrope. He takes a wound and fails a 5" charge... Ugh. In CC he finally takes out my Exocrine. I have little left so I just fire away and pray for some good dice.

Turn 6 Necrons: Despite fervent prayers on my part, the game continues! He runs his Warlord towards my CC to help out his wraiths, but is far away. He continues to blast away and takes my gants down to 3 models. My venomthrope is killed by an A.Barge, and the Tyrannofex is killed by the wraiths.

Turn 6 Nids:  Nothing to do here really. I shoot at things, don't do much, and assault his warriors (2 left) with 3 gants. Naturally, his overwatch yields 3 hits and I'm forced to go to ground on my own charge! No saves, and all 3 die.

Turn 7 Necrons: A few random shots as my opponent gamely plays this one out. We both know it's over however... his Overlord fails his charge at least.

Turn 7 Nids:  I move biovores onto an objective and shoot his two warriors off of mine. Then, my Zoanthrope zaps his solo warlord! It's still to little too late, as the game ends.

Total Score:
Primary: Necrons, 3-1 8 points
Secondary: Necrons, 6-1 5 points
Tertiary: Tie 1-1
Bonus: Tyranids take First blood, Last Blood and Warlord, Necrons take Warlord and Linebreaker

Final result: 16-4,  overwhelming Necron victory!

Post-game reaction:
I knew I was playing a top notch opponent, but ouchie! That hurt a lot. I think I was bit cocky given how well Nids did against Crons in the past, but my dice did me no favors there! Indeed, my opponents rolls were on fire as well. However, I did make two mistakes this game: 1. I didn't realize Arks were assault vehicles, and I wouldn't have outflanked the Tervi if I'd known. 2. I assumed I could beat down his wraiths in assault with enough units. That combat never ended, as turn 7 I had 6 gants to his 2 wraiths left. More importantly were some crucial moments when the Dice just hammered me. Flubbing a HUGE 4" charge really hurt. I would have nabbed Warlord, killed a troop, cost him an objective and claimed one as my own, as he had very little that could hope to kill that TFex. Getting6/6 hits with an A barge while snapfiring was demoralizing, as well as 3/4 hits with overwatch. The biggest factor was failing to shoot down any of his 6 man wraiths and then in having him last a total of 11 player turns without dying. Freeing up some of those scoring units would have been a huge boon as his troops were able to walk all around the board.

Still, credit where it's due, my opponent played a great game. He was able to pin back my army with the Wraiths and then simply shot down everything I tried to break his lines with. A great game to Jonathan, who was a very friendly guy despite the lopsided dice.

Coming Sunday: Tyranids vs Tau!